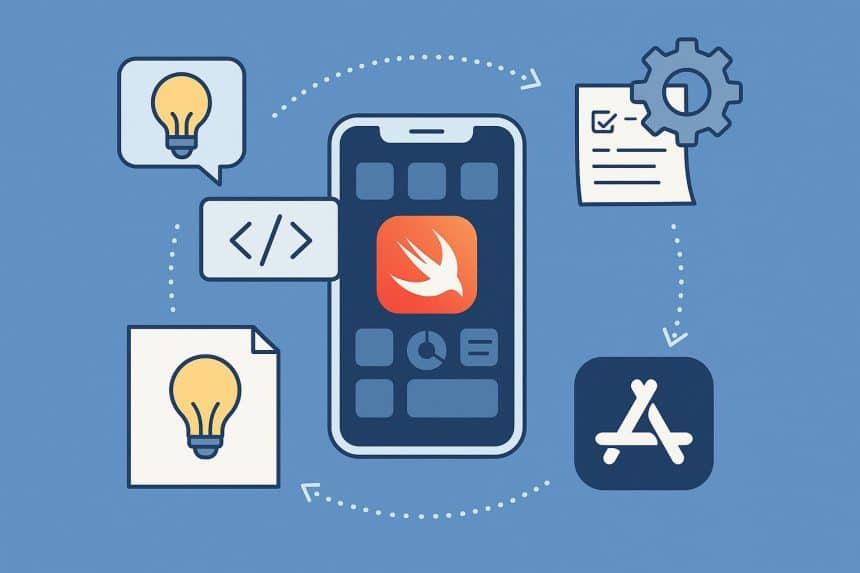
Developing an iOS application involves far more than just writing code. It’s a structured process that moves systematically from an initial concept to a fully functional product available for millions of users on the App Store. Understanding this lifecycle is critical for developers, designers, project managers, and entrepreneurs alike, as each phase carries specific goals, tools, and challenges.
In this detailed guide, we’ll break down every stage of the iOS app development lifecycle—from ideation and design to deployment and maintenance—while emphasizing how thoughtful planning and execution at each step can lead to a successful app launch.

The Importance of a Structured Lifecycle
Many newcomers to mobile development underestimate the complexity of bringing an app to market. However, without a defined process, projects risk budget overruns, delays, and performance flaws.
A structured lifecycle ensures:
- Clarity — Every team member knows their role and timeline.
- Consistency — Design, functionality, and code standards remain uniform.
- Quality Control — Each stage includes testing and feedback loops.
- Faster Delivery — Systematic planning reduces rework and errors.
By following a logical workflow, teams can move seamlessly from the idea stage to a polished, user-friendly application on the App Store.
Phase One: Ideation and Market Research
Every great app begins with a strong idea. However, not every idea translates into a viable product. The ideation phase focuses on turning abstract concepts into actionable plans.
Define the Core Problem
Ask yourself: What user problem am I solving? Successful iOS apps are solutions, not just tools. Identify gaps in the market, pain points, or needs that existing apps fail to meet.
Conduct Market Research
Before moving further, research is essential. Explore:
- Competitor analysis (similar apps, features, ratings).
- Target audience behavior and expectations.
- Current trends in mobile app development and iOS technologies.
Establish a Value Proposition
Your app should offer a unique selling point (USP). For instance, if you’re developing a fitness tracker, what makes it stand out—AI-based insights, gamified goals, or integration with wearable devices?
| Ideation Task | Objective | Output Example |
| Problem Definition | Identify user pain points | “Users struggle to manage workout schedules effectively.” |
| Competitor Research | Study existing market players | List of 5–10 similar apps |
| Target Audience Mapping | Define who will use your app | Fitness enthusiasts, ages 18–35 |
| Value Proposition | State why your app is different | “Personalized, AI-powered training plans” |
At the end of this phase, you should have a validated concept ready for planning and design.
Phase Two: Planning and Strategy
Once your idea is refined, it’s time to plan the project scope, technical stack, and development timeline.
Define Functional and Non-Functional Requirements
Create a requirements specification document (RSD) that details features, performance expectations, data handling, and user experience goals.
Choose the Right Technology Stack
Apple’s development ecosystem revolves around key technologies like:
- Swift or Objective-C (programming languages).
- Xcode (integrated development environment).
- UIKit and SwiftUI (UI frameworks).
- Core Data (for data persistence).
- TestFlight (for beta testing).
Choosing between native and cross-platform approaches is also important. Native iOS development ensures optimal performance, while cross-platform frameworks like Flutter or React Native allow shared codebases for multiple OS platforms.
Create a Roadmap
A project roadmap outlines milestones and delivery phases. It helps developers, designers, and QA testers stay aligned.
| Milestone | Goal | Timeline Estimate |
| Design Completion | UI/UX prototypes finalized | 3–4 weeks |
| MVP Development | Basic functional version built | 6–8 weeks |
| Beta Testing | User feedback and bug fixing | 2–3 weeks |
| App Store Submission | App review and launch | 1–2 weeks |
Planning well in advance reduces surprises and aligns all teams toward a shared vision.
Phase Three: UI/UX Design
The design phase translates ideas into visual form. In iOS development, user interface (UI) and user experience (UX) design play a critical role in engagement and usability.
Wireframing and Prototyping
Wireframes are blueprints that define app flow and screen relationships. Designers use tools like Sketch, Figma, or Adobe XD to create low- and high-fidelity mockups.
Design Guidelines
Apple enforces specific design standards known as Human Interface Guidelines (HIG). These ensure apps:
- Feel consistent across the iOS ecosystem.
- Provide intuitive navigation.
- Maintain readability, accessibility, and visual balance.
Usability Testing
Before finalizing designs, conduct usability testing to validate whether the interface feels intuitive. This prevents expensive redesigns later in development.
Phase Four: Development
This is the execution phase—where design becomes code. It is typically divided into frontend, backend, and integration layers.
Frontend Development
Frontend (client-side) handles everything users interact with directly. Developers implement screens, animations, gestures, and data presentation. Using SwiftUI, teams can create responsive, dynamic interfaces that adjust to device orientation and screen size.
Backend Development
Backend systems manage user data, authentication, and communication with servers. iOS apps often use APIs to connect with cloud databases or third-party services. Developers rely on Node.js, Firebase, or AWS Lambda for backend infrastructure.
Integration and APIs
API integration ensures that app components interact smoothly. Common examples include:
- Payment gateways (Apple Pay, Stripe).
- Geolocation services (MapKit).
- Notifications (APNs).
- Analytics tools (Firebase Analytics).
Development Methodology
Most modern teams adopt Agile or Scrum frameworks, allowing iterative updates, frequent testing, and continuous user feedback.
Phase Five: Testing and Quality Assurance
Thorough testing ensures the app performs reliably before public release. It’s not just about finding bugs; it’s about delivering quality.
Types of Testing
- Unit Testing: Verifies that individual modules function correctly.
- UI Testing: Checks user interface elements for consistency and responsiveness.
- Performance Testing: Evaluates speed, battery impact, and memory usage.
- Security Testing: Identifies vulnerabilities in data handling or APIs.
- Beta Testing: Conducted via TestFlight with real users to gather final feedback.
Automation and Tools
Automation tools like XCTest, Appium, and Katalon Studio accelerate testing cycles.
| Test Type | Purpose | Tool Used |
| Unit Tests | Validate logic accuracy | XCTest |
| UI Tests | Check visual and interaction flow | Xcode UI Recorder |
| Load Testing | Simulate heavy usage | Firebase Test Lab |
| Security Testing | Ensure data integrity | OWASP ZAP |
Continuous testing during development prevents major issues during deployment.
Phase Six: Deployment to the App Store
Reaching the App Store is the ultimate milestone, but it requires compliance with Apple’s strict guidelines.
Preparing for Submission
Before submission, ensure that:
- The app icon, metadata, and screenshots are ready.
- The privacy policy and data-handling disclosures are accurate.
- The app meets all App Store Review Guidelines.
The Submission Process
- Sign in to App Store Connect.
- Upload the build via Xcode.
- Fill in required details—app description, keywords, support URLs, and version notes.
- Submit for review.
Apple reviews apps manually, typically within 24–48 hours, although complex cases may take longer. Once approved, your app becomes publicly available.
Post-Launch Activities
After launch, monitor app analytics and user feedback closely. Common KPIs include:
- Crash rate.
- Average session duration.
- Retention rate.
- App Store ratings and reviews.
Promptly responding to user feedback and pushing regular updates can significantly improve long-term success.
Phase Seven: Maintenance and Continuous Improvement
Deployment isn’t the end of the journey—it’s the beginning of ongoing maintenance.
Regular Updates
Apple’s frequent iOS updates mean developers must continuously ensure compatibility. Apps should evolve with user expectations and security standards.
Bug Fixes and Optimization
Even well-tested apps encounter unforeseen issues once exposed to thousands of users. Prompt bug fixes maintain trust and reliability.
Feature Enhancements
Regularly review analytics to identify popular features and opportunities for enhancement. Iterative updates based on feedback strengthen engagement and retention.
Performance Monitoring
Use analytics tools such as Firebase Crashlytics or Apple’s App Analytics to track stability, loading times, and network usage.
The Role of Collaboration and Expertise
Successful app development is not just about code—it’s about collaboration. Designers, developers, QA testers, marketers, and project managers all play vital roles.
For businesses planning large-scale applications or aiming for industry-grade quality, partnering with an experienced iOS App Development Company can help streamline the entire lifecycle. Such teams bring technical expertise, design excellence, and process maturity that ensure the app aligns with Apple’s ecosystem standards while meeting business goals.
Common Pitfalls to Avoid in the Lifecycle
Despite having a structured process, many projects face common challenges.
| Pitfall | Cause | Prevention Strategy |
| Undefined requirements | Skipping documentation | Create detailed specs early |
| Ignoring Apple’s guidelines | Lack of review knowledge | Follow HIG and App Store rules |
| Insufficient testing | Rushed schedules | Include QA in every sprint |
| Poor communication | Lack of transparency | Use Agile with regular stand-ups |
| Neglecting updates | Post-launch inertia | Schedule maintenance cycles |
Steering clear of these common mistakes leads to a more efficient development process and a stronger, more satisfying user experience.
Future Trends in iOS App Development
The iOS ecosystem continues to evolve rapidly. Developers should keep an eye on these trends shaping future projects:
- SwiftUI dominance: SwiftUI is replacing UIKit for faster and cleaner UI development.
- ARKit and Vision Pro integration: Apple’s augmented reality frameworks are expanding immersive experiences.
- AI-powered personalization: Machine learning models enhance predictive features within apps.
- Privacy-first architecture: Apple’s App Tracking Transparency (ATT) policy emphasizes user control over data.
- Wearable and ecosystem connectivity: iOS apps increasingly integrate with watchOS, iPadOS, and tvOS.
Understanding these trends ensures your development approach remains future-ready.
Conclusion
The iOS app development lifecycle is a dynamic, multi-phase process that balances creativity, engineering, and user experience. From idea validation to App Store deployment, each stage plays a vital role in building apps that users trust and enjoy.
By carefully following this structured approach—researching your market, designing intuitive interfaces, writing efficient code, testing thoroughly, and maintaining continuously—you can navigate the path to a successful launch with confidence.
Ultimately, whether you’re an aspiring developer or a business stakeholder, mastering this lifecycle allows you to transform innovative ideas into reliable, impactful iOS applications that stand out in an ever-competitive digital marketplace.