According to a 2024 study, 90 percent of online shoppers rely on clear product photos before they tap “Buy.” That stat explains why background blur—the soft, shallow-depth effect that isolates your item—has become an e-commerce essential. What once required a wide-aperture DSLR now sits in your pocket via the iPhone and a few clever apps. If you’ve already nailed lighting and composition in our Basic Product Photography guide, this article will help you add pro-grade blur, choose the right tools, and turn ordinary shots into images that sell.
Why background blur elevates product photos
Online shoppers decide whether to keep scrolling in as little as 10–20 seconds, according to a 2023 Nielsen Norman Group study. A blurred backdrop helps you win that brief window by doing three things at once:

- Locks eyes on your product. Removing visual clutter directs attention to the item. CyberLink notes that blur “draws attention precisely where it’s intended.”
- Signals studio-level quality. Shallow-depth photos read as professional, suggesting higher craftsmanship even if you shot them on a kitchen table.
- Adds breathable depth. A gentle focus fall-off makes the scene feel airy while the product looks dimensional, helping shoppers judge contours and scale.
Blur also sets tone. A hazy string of fairy lights whispers cozy evenings, while a wash of muted green hints “outdoors” without spelling out every detail. Context stays present but never steals the spotlight.
Treat blur as a strategic tool, not a blanket rule. Amazon still requires a pure-white, razor-sharp main image for every listing, according to PhotoRoom. Use background blur in lifestyle shots, social posts, or on your own site—anywhere you control the aesthetic. Hide distractions, highlight what matters, and you’ll nudge buyers closer to that decisive click.If you’re shooting with just your phone and want to elevate your image-making beyond quick snapshots, check out this smartphone photography guide.
How blur works: from DSLR glass to Portrait mode
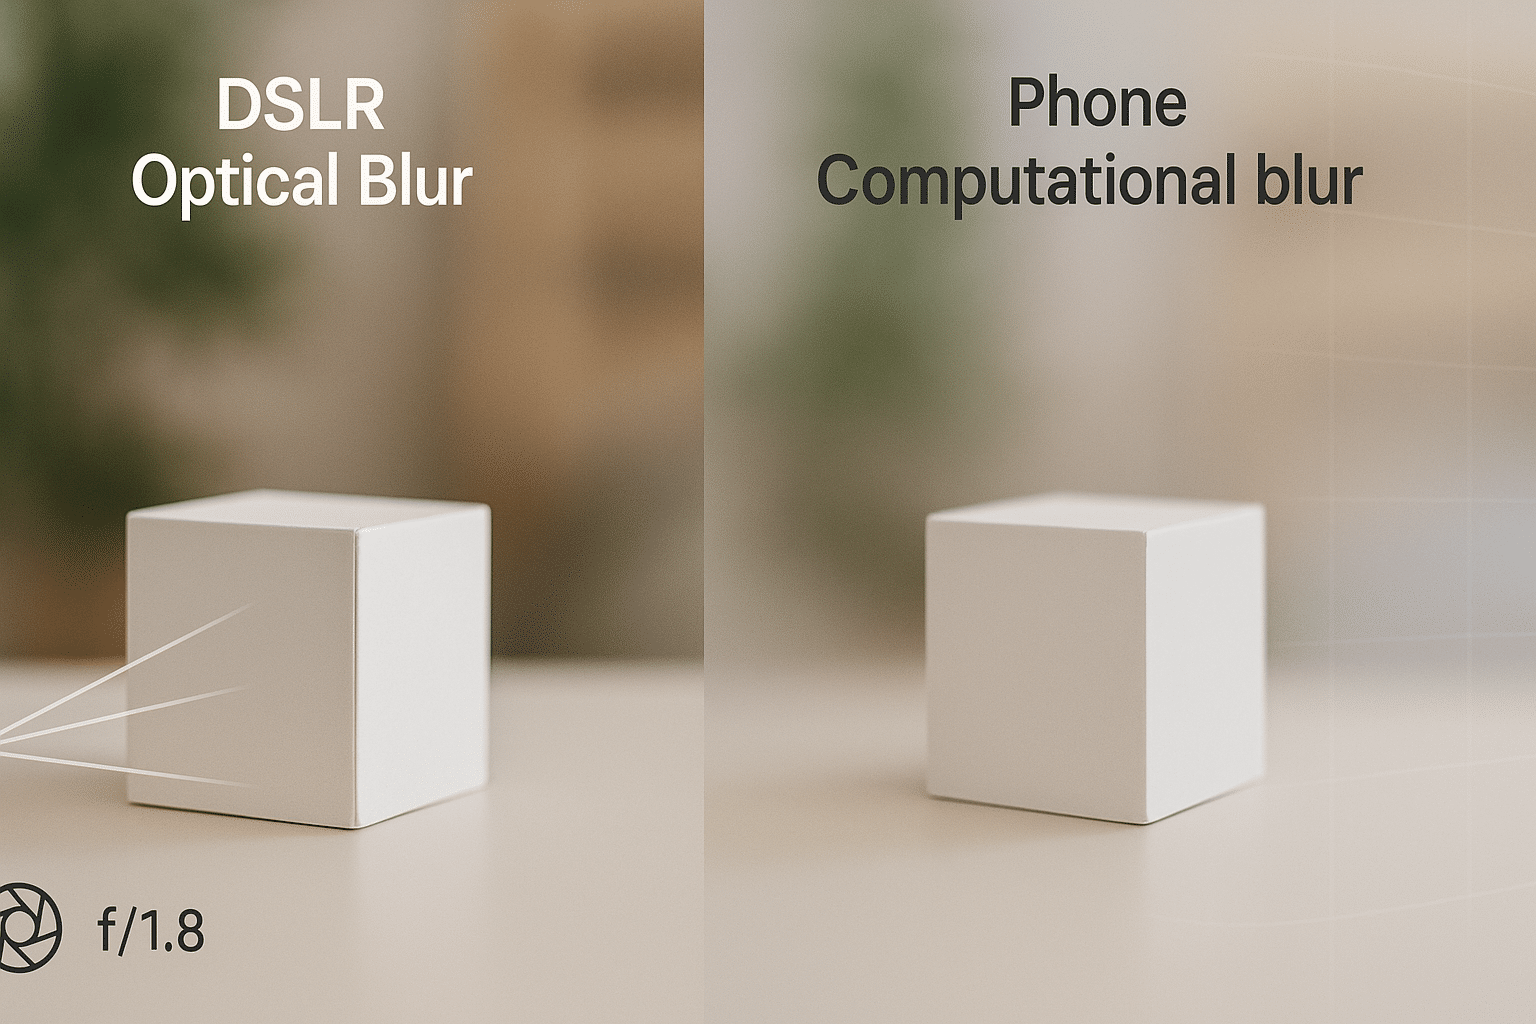
With a DSLR, you spin the aperture ring to f/1.8, lock focus on the subject, and let optics create natural bokeh, the dreamy background blur. The wide opening produces a shallow depth of field, so anything behind the focus plane melts away.
Smartphones face the opposite physics. Their tiny 1/1.7-inch (or smaller) sensors and short focal lengths keep nearly everything sharp, a setup reviewers call an “almost infinite” depth of field, according to Dxomark. To mimic a DSLR, manufacturers leaned on computational photography. Apple introduced Portrait mode on iPhone 7 Plus in 2016; twin lenses captured a depth map and software softened the background.
Apple refined the feature again with iPhone 15 in 2023. The camera now records depth data in standard Photo mode, so you can tap Portrait later in Photos and adjust a blur slider without reshooting, notes MacRumors.
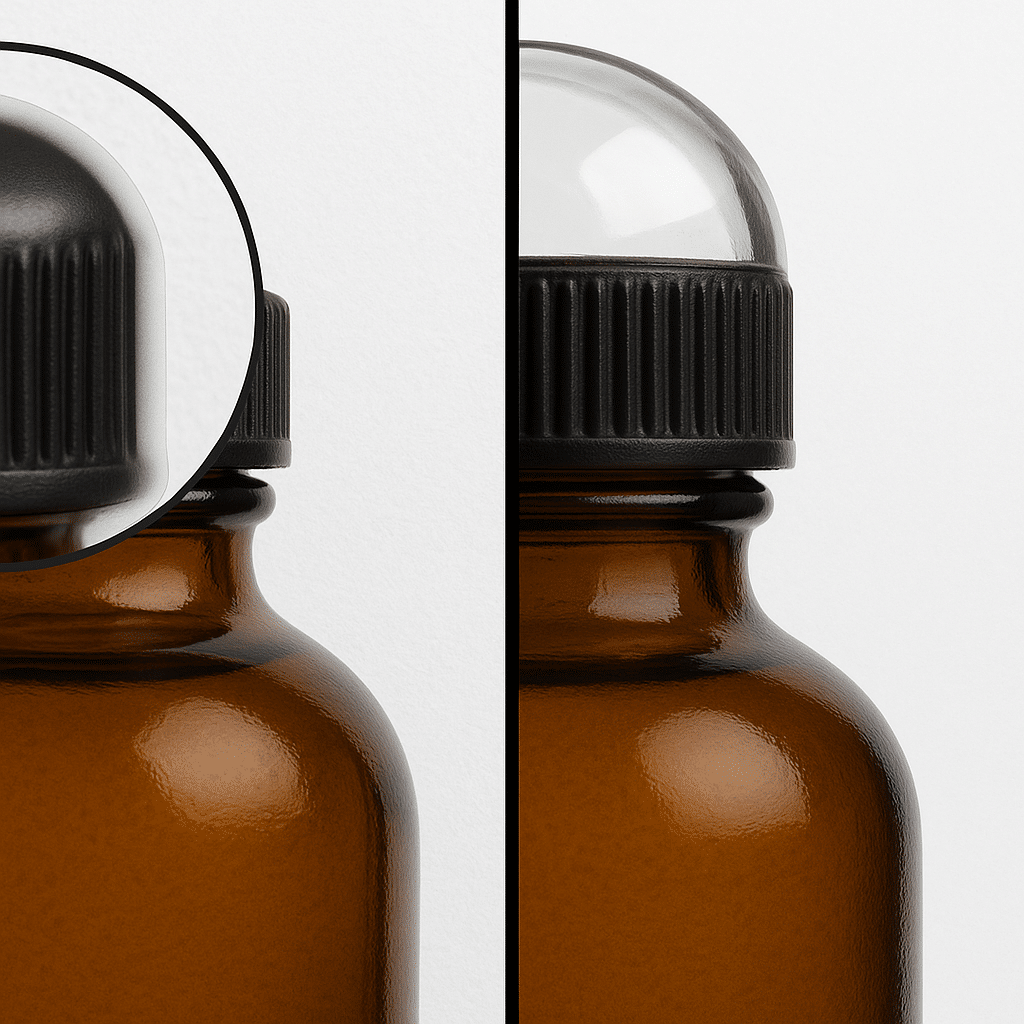
Software is not flawless. Fine hair, translucent glass, or shiny edges can confuse the depth mask, leaving halos or sharp patches—issues reviewers still noted across brands in 2024, according to PetaPixel. Post-shoot editing apps let you refine the mask, adjust blur strength, and rescue shots that Portrait mode almost fixed.
Understanding how optics and algorithms work together will guide the tool choices that follow.
E-commerce standards: why blur is booming
Online marketplaces keep raising the image bar. Amazon can suppress a listing if the main photo is not on a pure-white background or fails other technical checks. Image compliance is a leading cause of suppression, and hidden listings mean instant revenue loss, notes PhotoRoom. Etsy also advises sellers to maintain a studio-clean look across every photo set.
Why does blur help?
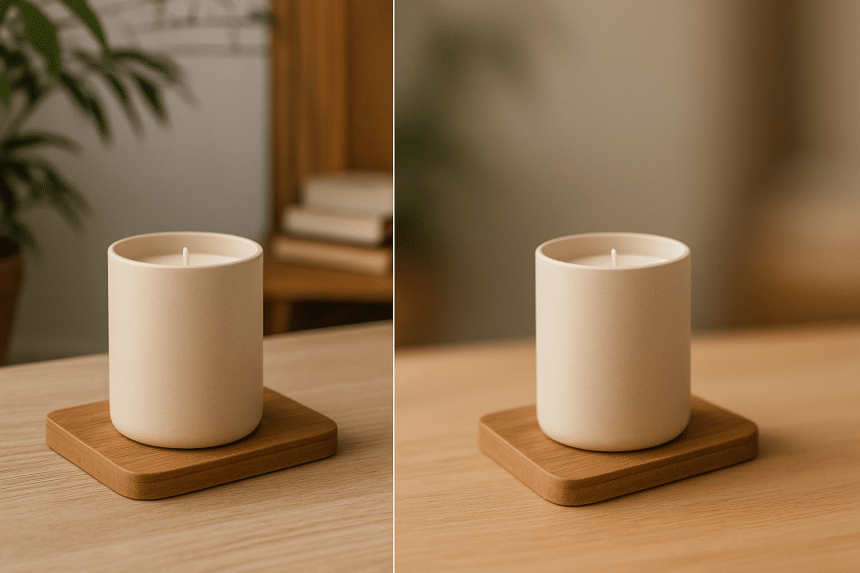
- Keeps lifestyle context, hides clutter. A gentle background blur lets you show the candle on a café table or a phone case on a busy desk without the mess shouting “amateur.” For craft-supply sellers like Country Brook Crafts, keeping backgrounds clean helps shoppers see true textures, patterns, and colors without competing visual noise.
- Protects click-through and trust. A large-scale peer-to-peer marketplace study found that higher-quality images correlate with a greater likelihood of sale and stronger buyer trust, according to research published on arXiv.
- Caters to mobile shoppers. Mobile now drives 57 percent of global e-commerce sales, a share projected to hit 59 percent in 2025, reports Oberlo.
Bottom line: blur is more than style. It acts as a compliance guard, a branding cue, and a conversion lever. Master it and you will satisfy marketplace rules while telling a visual story that sells.
Choosing the right tool: blur-ready apps
Below are six iOS-friendly editors that handle background blur well. Each one fits a specific use case, so choose the match, not just the brand you know.
Snapseed (free)
Google’s Lens Blur filter, previously called Tilt-Shift, lets you place a focus ring, feather edges, adjust strength, and export at full resolution. It suits sellers who want pro control without a subscription.
Photoshop Express (freemium)
Open Adjustments > Blur, pick Radial for selective depth or Full for an all-over wash, then refine the mask. Adobe Sensei makes the first cut; you fine-tune the rest.
Facetune (freemium)
The Defocus tool lets you swipe across the subject and blur everything else. Facetune reports more than 300 million downloads and holds a 4.6-star App Store rating, so the interface feels proven.
AfterFocus (one-time purchase)
Draw one line on the subject and another on the background; the Smart Focus engine builds a mask you can tweak before saving at the photo’s original size.
PhotoRoom (freemium to pro)
PhotoRoom auto-isolates the product, offers background-blur presets, and supports batch export, a real time saver for marketplace compliance. The app also claims more than 300 million downloads.
Focos (iOS only, freemium)
Focos reads your iPhone’s depth map so you can refocus after shooting, change aperture shape, or add three-dimensional lighting. Apple’s “Apps We Love” feature calls it a way to “add depth to your photos.”
Tip: Test two editors on the same image and compare edge accuracy at 200 percent zoom; you will quickly see which mask feels safest for your product line.
Snapseed tutorial
Snapseed’s Lens Blur tool gives you DSLR-style depth in three quick moves:
- Open the photo, then tap Tools → Lens Blur.
- Pinch to resize or rotate the oval focus area; the same gesture also changes blur size and shape.
- Drag the strength slider until distractions soften but edges still look natural.
Because Snapseed feathers the transition, you avoid the hard “cut-out” halo common in one-tap fixes. When you finish, stay in the workspace to lift shadows, add contrast, or export at full resolution. The app holds a 4.8-star rating on the U.S. App Store, reinforcing its reputation for high-quality output.
Adobe Photoshop Express
Photoshop Express provides a one-tap Blur Background quick action powered by Adobe Sensei. Tap Adjustments → Blur and the app auto-detects your subject, even around semi-transparent edges. A strength slider lets you fine-tune the effect; if Sensei misses a box corner or necklace chain, choose Refine Edge and brush the mask on or off.
When you finish, sync the image to Creative Cloud, send it to Lightroom for color work, or add text overlays in the same app. The workflow stays non-destructive, and the 4.7-star App Store rating highlights the tool’s reliability.
Facetune
Facetune’s Defocus tool lets you blur a background in seconds:
- Import the photo and tap Defocus.
- Brush across the product to keep it sharp; AI selects the rest of the frame and blurs it in real time.
- Use the intensity slider (left for a light wash, right for creamy bokeh) and lift your finger to see a live preview. If an edge looks off, swipe again or tap Undo.
Why pick Facetune? Speed. The app reports more than 300 million downloads and holds a 4.6-star App Store rating, showing that the quick workflow resonates with users. The core blur features are free; higher-resolution exports, additional filters, and batch tools sit behind an optional subscription.
AfterFocus
AfterFocus lets you draw one line across the subject and another across the background; its Smart Focus engine then builds a precise mask you can refine with a finger.
Once the mask is clean, you can:
- Adjust blur strength or swap aperture shapes (round, hexagon, motion) for different bokeh styles.
- Save at the photo’s original resolution, so Amazon’s zoom still works.
The trade-off is time: you may spend a minute tweaking lines, but the result is DSLR-level depth. If you shoot catalog “hero” images where every pixel matters, AfterFocus is worth the extra taps.
PhotoRoom
PhotoRoom targets sellers. A single tap isolates the product, then you decide where it sits. Choose Background → Blur and clutter fades into a soft wash. Because the subject lives on its own layer, edges stay sharp even at high blur levels. Need a studio look? Place the cut-out on pure white and add a faint shadow. Prefer lifestyle? Pick a pre-blurred café or desk template and adjust opacity.
Batch mode, offered in Pro plans, lets you edit 12 images at once and export at Amazon-compliant resolutions. The app reports more than 300 million downloads, a signal that sellers value its speed. For large catalogs, that automation keeps listings live and reduces late-night edits.
Focos
Focos taps the depth map stored in every Portrait-mode photo, so you can refocus after pressing the shutter. Open an image, slide the focus point onto your product, and pull the aperture dial wide open; the background melts away like a fast DSLR lens.
Need a different look? Switch the virtual aperture to round, hexagon, or a custom shape to tweak bokeh style. Because Focos edits true depth layers, fine details such as watch hands and earring hooks stay crisp while everything behind them fades.
The app is iOS-only and works best on dual-lens or LiDAR-equipped iPhones. Apple featured it in the 2023 App Store story “Fine-Tune Your Focus,” underscoring its studio-grade depth control. If you shoot catalog hero images on your phone and want precision without carrying extra glass, Focos deserves a spot in your toolkit.
How to blur your product photo background: step-by-step
- Start with a sharp, well-lit shot. Blur amplifies quality; it cannot rescue a soft or dim image. Natural window light and a steady hand or tripod deliver the cleanest base.
- Load the file and open the blur tool. In Snapseed tap Tools → Lens Blur; in Photoshop Express choose Blur Background; in PhotoRoom tap Background → Blur. Different label, same purpose: isolate the backdrop.
- Position the focus area. Drag or pinch the mask until every edge of your product sits inside the sharp zone.
- Set intensity. Raise the slider until distractions fade but context stays visible. Most e-commerce shots look natural between 40 percent and 60 percent blur power, according to Adobe Express user guidance.
- Check edges at 200 percent zoom. If hairlines or packaging corners look haloed, use the app’s brush or eraser to tidy the mask.
- Polish exposure and color. Small boosts in brightness, contrast, and warmth make the product pop; avoid heavy filters that could misrepresent the item.
- Export at full size. Amazon recommends at least 1,000 pixels on the longest side to enable its zoom tool. Choose “Original” or “Maximum” resolution before saving or sharing.
Follow these steps once, save the settings as a preset if the app allows, and future edits will take seconds.
Step 1: Start with a high-quality photo
Blur acts like a spotlight; it cannot fix motion shake or a dim room. Amazon warns that images “must not be blurry or pixelated,” or they risk removal from search results.
- Use soft, directional light. Position the product 2–3 feet from a large north-facing window. Shopify reports that indirect window light produces even, color-accurate results for product photos.
- Lock sharp focus. Pinch to zoom before you press the shutter; if the logo looks fuzzy in preview, it will stay fuzzy later.
- Set exposure manually. On iPhone, tap the subject and drag the sun icon until whites appear crisp but not blown out. Correct exposure keeps colors true once the background softens.
- Capture multiple angles. Extra frames give you options in the blur app and reduce the chance of a reshoot.
A tack-sharp, well-lit base image helps every blur tool in the next steps deliver its best work.
Step 2: Load the image and open the blur tool
- Import the photo.
- Snapseed → + icon
- Photoshop Express → Edit Photo
- PhotoRoom → drag the thumbnail into the canvas
- Open the blur control. Look under Tools or Adjustments for one of these labels: Lens Blur, Blur Background, or Defocus. The app drops a default focus mask in the center of your image.
- Position the mask. Drag or pinch until the entire product sits inside the sharp zone. You are telling the software, “Keep this crisp; soften everything else.”
- Check the live preview. Most editors update blur in real time, so use that feedback to make quick edge fixes before you set intensity in the next step.
Step 3: Dial in blur strength and check the edges
- Set intensity. Move the blur slider until distractions fade but context stays visible. Most editors look natural between 40 and 60 percent blur power, enough to separate the product without appearing artificial, according to Adobe Express community guidance.
- Zoom for edge inspection. Check the mask at 200 percent magnification; Adobe Stock reviewers recommend this level for spotting halos, stray hairs, or soft logos before submission. If you see flaws, use the brush or eraser to fine-tune the mask.
- Compare versions. Toggle the before-and-after view. If the new frame directs your gaze straight to the product, the blur is working. Save your draft and proceed to color polish.
Step 4: Finish the photo and export at full resolution
- Polish exposure and color.
- Add a touch of brightness and a small contrast bump, just enough to make edges pop.
- If mixed lighting skewed the scene, use the temperature slider to bring whites back to neutral.
- Skip heavy filters; buyers expect the shipped item to match the photo.
- Optional refinements. A subtle vignette can darken the corners and nudge attention inward, but keep the opacity low so it stays natural.
- Export for marketplace zoom.
- Choose Original or Maximum resolution and sRGB color space.
- Amazon recommends at least 1,000 pixels on the longest side to enable its zoom feature, and 1,600 pixels is preferred for sharper detail (2024, PhotoRoom).
- Double-check the export panel before you tap Save or Share.
Lock these settings once, save them as a preset if your app allows, and you will finish future edits in seconds.
Conclusion
- Zoom to 100 percent before you publish. If any logo, stitch line, or texture looks soft, reshoot. Nielsen Norman Group reports that users abandon pages within seconds when images appear low quality.
- Keep a hint of detail. Over-blurring removes realism; a PhotoRoom marketplace study found that photos with moderate depth, where the background remains recognizable, earned nine percent higher click-through than extreme blur.
- Stage against complementary colors first. Blur cannot fix clashing hues or busy patterns. Choose tones that match your brand palette, then soften.
- Stay consistent. Brands that maintain a uniform photo style can boost revenue by up to 33 percent, according to Squareshot. Decide on one blur strength for all lifestyle images.
- A/B test. Swap a blurred lifestyle shot into an existing listing for a week and track click-through and conversion. Data, not hunches, shows how much blur moves the revenue needle.