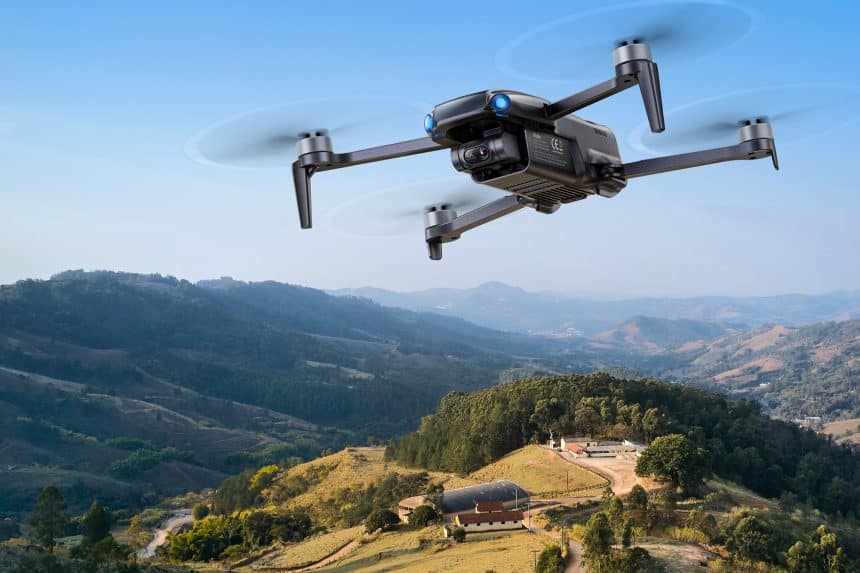
Flying a drone is more than just taking it to the sky—it’s about capturing moments that look cinematic and professional. If you’ve just picked up the Ruko U11MINI 4K, this guide will walk you through how to make the most of its shooting capabilities and creative modes.
Step 1: Pre-Flight Check
Before takeoff, make sure everything is ready:

Battery – Fully charge your batteries, and always bring spares.
Propellers – Check for cracks or looseness. Replace if needed.
Flight Environment – Look around for trees, power lines, or tall buildings that may interfere with your flight path, and avoid crowded areas.
A quick check prevents accidents and ensures smoother flights.
Step 2: Record Smooth 4K Video and Capture 8K Photos
To start, insert a microSD card and enable 4K@30fps video recording for crystal-clear footage. The drone also lets you shoot 8K still photos, which means every frame can preserve details you won’t get with regular cameras.
Pro Tip: For the smoothest results, fly in calm weather and let the 3-axis gimbal handle stabilization. Even if the wind picks up, your shots will stay cinematic.
Step 3: Use the Gimbal to Control Angles
The U11MINI 4K’s gimbal doesn’t just keep footage steady—it allows you to adjust the shooting angle mid-flight. Switch between landscape and portrait orientation depending on whether you’re creating a YouTube video or a vertical TikTok clip.
Pro Tip: Experiment with slow tilts for dramatic shots, like moving from the horizon to a subject on the ground.
Step 4: Activate Intelligent Flight Modes
Open the Ruko app and take advantage of its built-in smart features:
- Follow Me Mode – Perfect for jogging, biking, or walking while the drone tracks your movement.
- Custom Path Planning – Draw a route in the app, and the drone will fly it automatically.
- Gesture Shooting – Hold up a hand signal to trigger photos without pressing a button.
These modes make it easier to focus on creativity instead of just piloting. And if you’re worried about running out of power during a long shoot, don’t be—the U11MINI 4K three-battery package gives you up to 96 minutes of flight time, so you can keep experimenting without rushing.
Step 5: Land Safely with Smart Return-to-Home
If you move around during your flight—for example, walking from one side to another—the app lets you update the drone’s home point. This ensures it lands close to where you are, not just where you first took off.
Pro Tip: Always update the return point before ending a flight if you’ve changed your location.
Step 6: Post-Flight Check
After landing, take a minute to inspect your drone. Look for scratches, bent propellers, or loose parts, especially if you flew in a crowded or obstacle-filled area. Proper care after each flight extends the life of your gear.
Common Beginner Mistakes and How to Avoid Them
Not fully unfolding the drone arms – Always make sure each arm is completely extended and locked in place before takeoff.
Ignoring wind conditions – The U11MINI 4K is stable, but strong gusts can drain the battery quickly.
Flying too far without checking battery – Always plan enough time to return safely.
Forgetting SD card recording – Without an SD card, video saves in lower resolution.
By keeping these tips in mind, beginners can avoid the most common pitfalls and enjoy a smoother experience.
Who Should Use the Ruko U11MINI 4K?
This drone is ideal for:
- Travelers who want portable, high-quality aerial shots.
- Content creators posting on YouTube, Instagram, or TikTok.
- Beginners looking for an easy-to-fly drone with safety features.
- Hobbyists and families who want to capture unique perspectives of daily life.
Final Thoughts
With its 4K video, 8K photos, 3-axis gimbal, and intelligent flight modes, the Ruko U11MINI 4K makes aerial photography accessible to everyone. Follow these steps, and you’ll be capturing footage that looks like it came straight out of a professional studio.