Introduction
Wind noise can distort audio, rendering even high-quality video amateurish. Adobe Premiere Pro 2025 helps designers solve these problems with its powerful audio editing capabilities.
This article covers five effective Premiere Pro 2025 wind noise removal methods: High-Pass Filter, Parametric Equalizer, DeNoise, Dynamics Effect, and Essential Sound Panel. It also reveals a great alternative, that is the EaseUS Online Vocal Remover, a flexible program that easily removes unwanted sounds. For those looking for more advanced solutions, AI stem splitters can also provide excellent results in isolating and enhancing audio quality.
Methods to Remove Wind Noise
These methods will provide you with clear audio, regardless of your video editing skills.
1. Using the High-Pass Filter
Premiere Pro’s High-Pass Filter cleans audio quickly and easily. Wind noise is eliminated, but singing and instruments are kept. Ideal for outdoor recordings that are prone to wind-induced low-frequency rumbling.
Follow the steps to apply the High-Pass Filter:
Step 1. Enter your project in Adobe Premiere Pro.
Step 2. Select “Effects”> “Audio Effects”> “Filter and EQ.”
Step 3. Select “HighPass” from the filters.
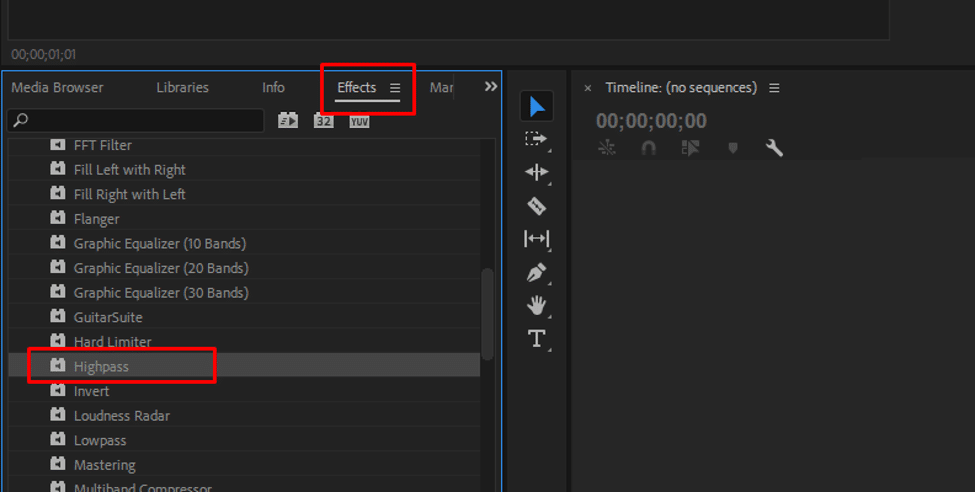
Step 4. Drag and drop the “HighPass” filter into your timeline audio clip.
Step 5. Adjust the “Cutoff Frequency” slider in “Effect Controls”. Start at 80–120 Hz to target wind rumbling without damaging vocals.

Step 6. Preview your footage to confirm that noise reduction does not compromise sound quality.
2. Using the Parametric Equalizer
Parametric Equalizers may reduce wind noise. It allows you to fine-tune frequency bands to reduce low-frequency noise while keeping mid- and high-frequency ranges. It controls various frequency bands more precisely than the High-Pass Filter. Follow the steps:
Step 1. Look for “Parametric Equalizer” under “Effects”.

Step 2. Drop the effect on your audio clip.
Step 3. In “Effect Controls,” click “Edit” beneath “Parametric Equalizer.”
Step 4. Slowly decrease low-end frequencies using the low-cut band (“HP” or “Low”) from 80 Hz.
Step 5. Adjust the Q-factor (frequency band width) for smoother transitions.
Step 6. Play back the audio to eliminate wind noise without affecting voices or music.
Step 7. Make modifications until the desired clarity is achieved, then click “OK.”

3. Using the DeNoise Effect
The DeNoise effect targets wind, hum, and other ambient noises. Intelligent noise reduction techniques clean and preserve audio quality. Follow these steps:
Step 1. Start your Premiere Pro project.
Step 2. Choose “Effects” > “Audio Effects” > “Noise Reduction/Restoration.”
Step 3. Choose “DeNoise” from effects.
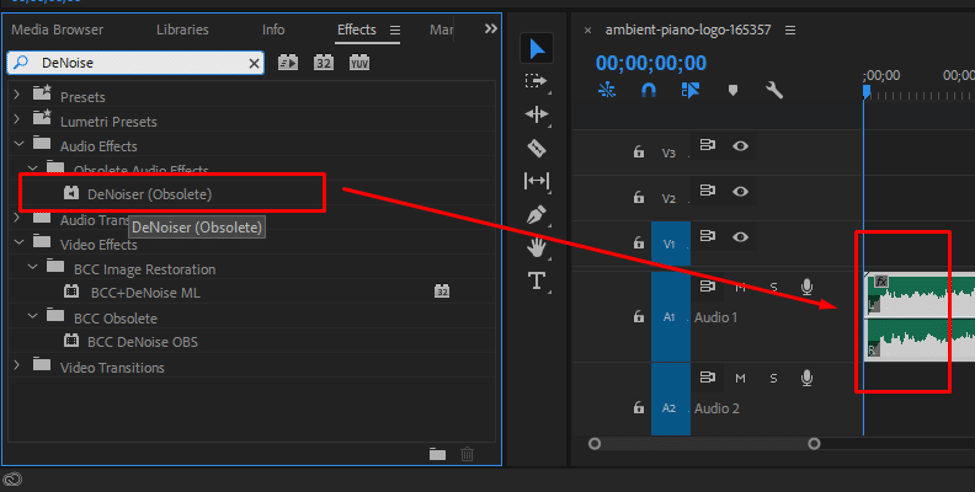
Step 4. Drop it on your timeline audio clip.
Step 5. Set the edit bar to adjust the noise level and reduce it by 30-40%.
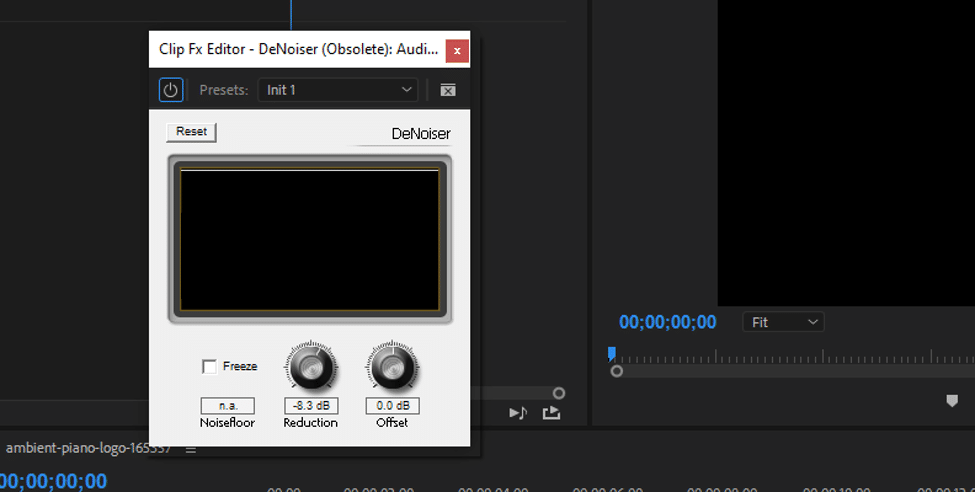
Step 6. Click “OK” when revisions are complete.
4. Using the Dynamics Effect
Premiere Pro’s Dynamics Effect provides sophisticated audio control. It reduces background noise by compression, expansion, and noise gating.
Steps to Add Dynamics Effects:
Step 1. Import your project and select “Effects” > “Audio Effects.”
Step 2. Find “Dynamics.”
Step 3. Drop the effect on your audio clip.
Step 4. Click “Edit” next to Dynamics in the “Effect Controls” tab.
Step 5. Make the adjustments in the “Effects” tab to mute the wind and other background sounds while no one is talking.
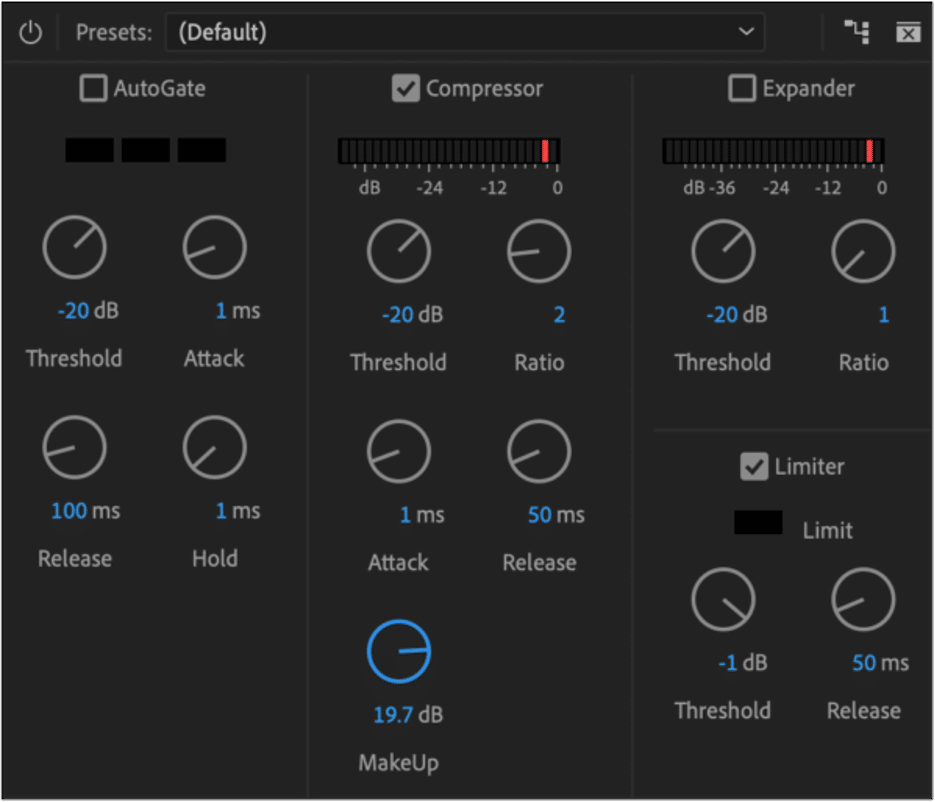
Step 6. Adjust compression or limiter for balanced audio. Once satisfied, click “OK.”
5. Using Essential Sound Panel
Premiere Pro’s Essential Sound Panel simplifies noise reduction and audio enhancement for guided workflows.
Use of the Essential Sound Panel:
Step 1. Add your audio or video to the timeline.
Step 2. Open the panel by selecting “Window” > “Essential Sound Panel”.
Step 3. Select your clip and select “Dialogue” or “Music” for speaking or instrumental.
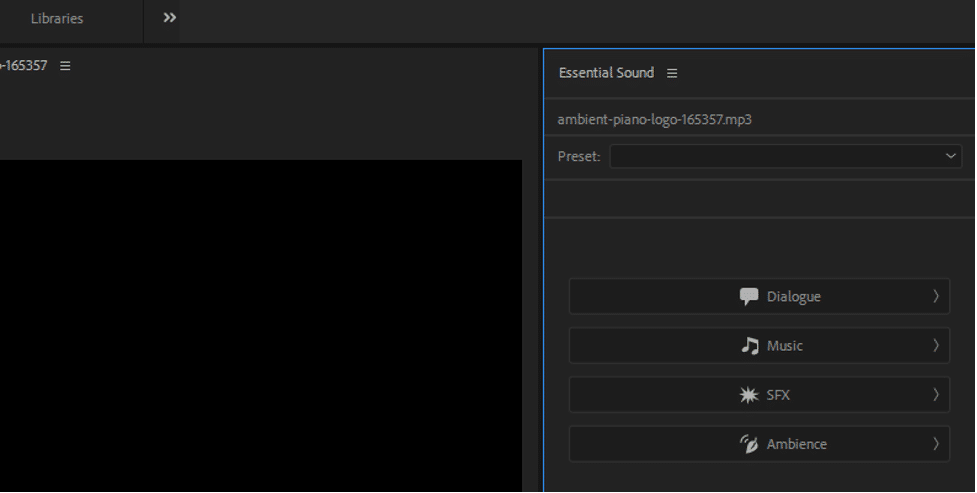
Step 4. Select “Repair” and “Reduce Noise Effect”.
![How to Remove Wind Noise in Premiere Pro 2025 [5 Methods]](https://ilounge.pro/wp-content/uploads/2025/08/Select-22Repair22-and-22Reduce-Noise-Effect22.png)
alt: adjust reduce noise
Step 5. Reduce wind noise with the slider.
Step 6. Preview audio and adjust parameters for optimal results.
Step 7. Click “OK” after modifications.
Tips to Avoid Wind Noise
Premiere Pro may reduce wind noise, but prevention is the best approach. Here are some tips:
- For outdoor filming, use a windshield or foam microphone cover to protect your microphone from the weather.
- Avoid direct wind exposure while placing microphones.
- For audio backup, record many takes in diverse settings.
- Use directional microphones to reduce noise.
Minimizing wind interference when recording saves a lot of editing time.
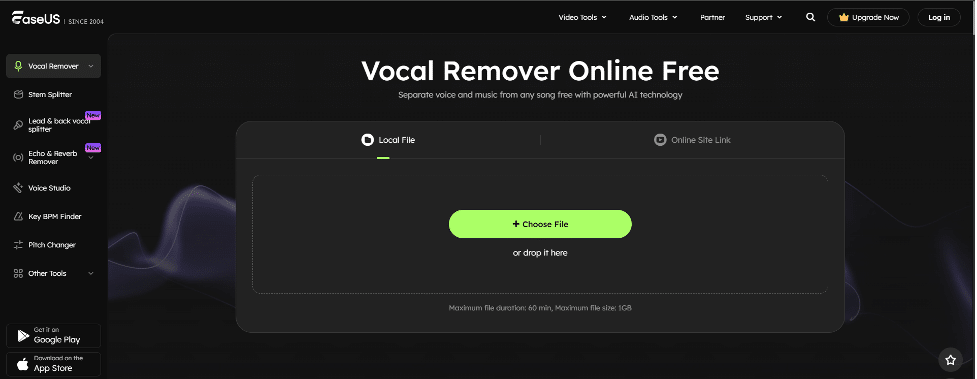
Online Solution: EaseUS Online Vocal Remover
EaseUS Online Vocal Remover quickly and easily removes wind noise from audio files. AI distinguishes vocals, instruments, and background sounds with this smart online application. Without expensive tools, video and music artists, as well as casual listeners, can receive professional audio.
Cloud-based EaseUS Online Vocal Remover supports Windows, macOS, Android, and iOS. Mobile audio editing doesn’t require expensive gear or planning.
Key Features and Benefits:
- AI systems detect voices, instruments, and background sounds without distortion.
- Supports MP3, WAV, M4A, FLAC, MP4, MOV.
- Creatively edit audio by controlling playback speed and pitch.
- In seconds, removes wind noise and background disturbance.
- Audio processing is done on secure cloud servers, removing the need for high-end PCs.
- Free basic audio processing, with premium subscriptions offering quicker speeds and bigger file sizes.
- Upload, process, and download your audio without software.
How to Remove Wind Noise with EaseUS Online Vocal Remover
Step 1. Step 1. In EaseUS Online Vocal Remover, select “Vocal Remover” from the main menu.
Step 2. Select “Choose File” or drag and drop your audio/video file. Let the AI tool process your file.
Step 3. Preview the cleaned audio to ensure it meets your needs after noise reduction.
Step 4. Finally, click “Export” to download your wind-noise-free audio or video.

Conclusion
Removing wind noise in Adobe Premiere Pro improves video clarity and professionalism. This article covered five successful methods: High-Pass Filter, Parametric Equalizer, DeNoise Effect, Dynamics Effect, and Essential Sound Panel. Each method offers specific options to fine-tune and reduce noise, providing a professional audio experience.
EaseUS Online Vocal Remover is ideal for rapid, straightforward removal. AI-powered noise reduction, speed changes, and extensive file format support make it easy to clean audio. As a novice or experienced editor, EaseUS delivers high-quality output quickly. Try it today for easy noise elimination.
FAQs
1. How to remove wind noise in Premiere Pro?
To reduce wind noise in Premiere Pro, use the High-Pass Filter, DeNoise Effect, or Essential Sound Panel. The effects isolate and reduce low-frequency sounds. Adjust the frequency settings and preview the audio to minimize wind noise without compromising vocal quality.
2. How to remove low rumbling noise in Premiere?
Remove low frequencies that produce rumbling with the High-Pass Filter or Parametric Equalizer. To eliminate hum in Premiere Pro, change the filter frequency to 80–100 Hz. Combine these filters with the DeNoise Effect to clear persistent rumbling.
3. How to remove wind noise from a video?
Drag a video into Premiere Pro and remove wind noise with High-Pass Filter, DeNoise, or Dynamics Effect. These techniques reduce wind noise while keeping the voice. Adjust the frequencies and evaluate the modifications for the best sound.