Sometimes, when you record audio or video, there are quiet parts that make it sound awkward or less smooth. These silent parts can mess up the flow and make the recording less polished. Luckily, there’s now a tool that can automatically remove those quiet spots with just one click, so you don’t have to spend time editing by hand.
This tool, called a silence detection tool, finds the quiet parts in your recording and removes them quickly. It makes your audio or video sound much better without the long, boring pauses.

In this article, we’ll show you how to detect audio silence and remove it from your videos and give you tips to avoid these quiet spots when you record in the future.
Part 1: How can Silence in the Video Destroy its Impact
Silence can make videos less fun to watch and not as interesting. Some tools can help remove silence, but first, let’s see how silence can hurt the quality of a video:
1. People Lose Interest
When a video has long, quiet moments, people might get bored. Silence doesn’t keep their attention, and they want something more exciting. If they get bored, they might stop watching and go find a different video. This can be frustrating for people who make videos, which is why short, exciting videos are more popular.
2. No Emotional Connection
Sound and music help create feelings in a video. Silence, on the other hand, doesn’t make people feel anything. Without sound effects or talking, a video can seem empty. It’s harder for viewers to connect with the video and feel emotions without sound.
3. Interrupts the Flow
Quiet parts can mess up the smooth flow of a video. People want the scenes to move naturally from one to the next. But when there’s sudden silence, it can be annoying and make the video feel choppy. This can confuse the audience and make it harder for them to understand the message.
4. Feels Awkward
Silence can create uncomfortable moments, especially if it lasts too long. Viewers might feel awkward and unsure of what’s happening. These quiet gaps can make the video less enjoyable and leave people with a bad impression.
5. Less Engagement and Sharing
If a video has too much silence, people are less likely to share it or talk about it. Quiet moments don’t make the video exciting. On the other hand, videos with good sound and music are more likely to grab attention. If your video has a lot of silence, it may not get the reaction you were hoping for.
Part 2: How to Detect Silence with Filmora
Wondershare Filmora is an all-in-one video editor that comes with lots of tools to help make your videos look great. It’s easy to use and even has a special tool that can automatically remove silent parts of your video. This makes it perfect for creating fun and engaging videos!
With Filmora, you can get rid of silent moments in just one click. There are three main settings you can adjust: the threshold, buffer, and duration, which help control how the silence is removed. Once you’re happy with the settings, just click “Start,” and all the quiet or low-volume parts of the video will be cut out, leaving you with a smooth and clean video.
Before we talk about how to find and remove silent parts in your video, let’s first look at some of the cool features of Filmora.
Key Features
Here are some of the features of the Audio Silence Detection tool.
- Effortlessly Remove Unwanted Voice Parts
Save time and energy by avoiding the hassle of manually searching for and cutting silent sections in your video.
- Automatically Detect Unwanted Silence
Long pauses can disrupt the flow of your video and leave viewers confused or frustrated. With Filmora silence detection, you can automatically detect and remove silent sections from your clips, improving the overall viewing experience.
- One-Click Silence Removal
Manually finding and editing each pause can take forever. Filmora makes it easy by allowing you to cut out awkward silences with just one click, speeding up your editing process.
Step-by-Step Guide
Here’s a simpler way to explain how to use Filmora Silence Detection features:
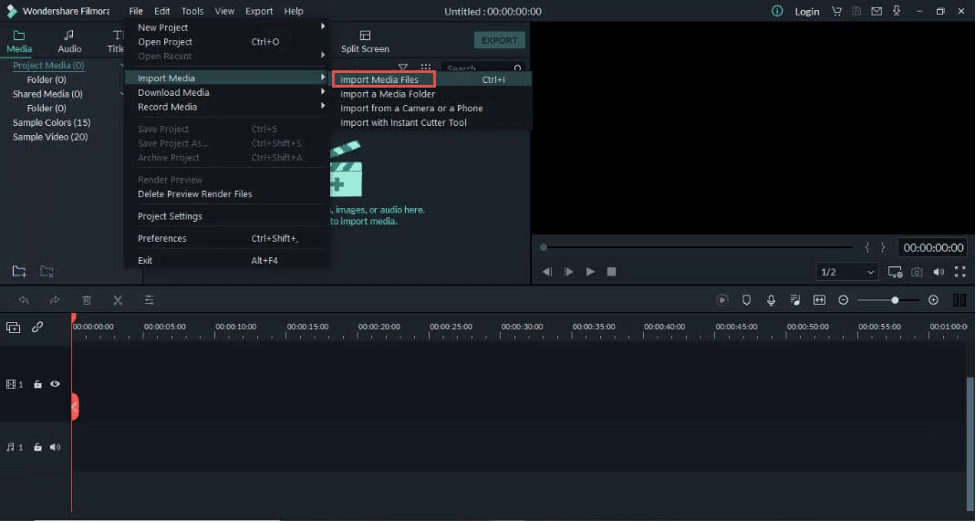
1. Download and Open Filmora:
First, download and install Wondershare Filmora Silence detection on your computer. Open the program, and click on File. Then, click Import Media > Import Media Files and choose the video you want to edit. Click OK to add it to the project.
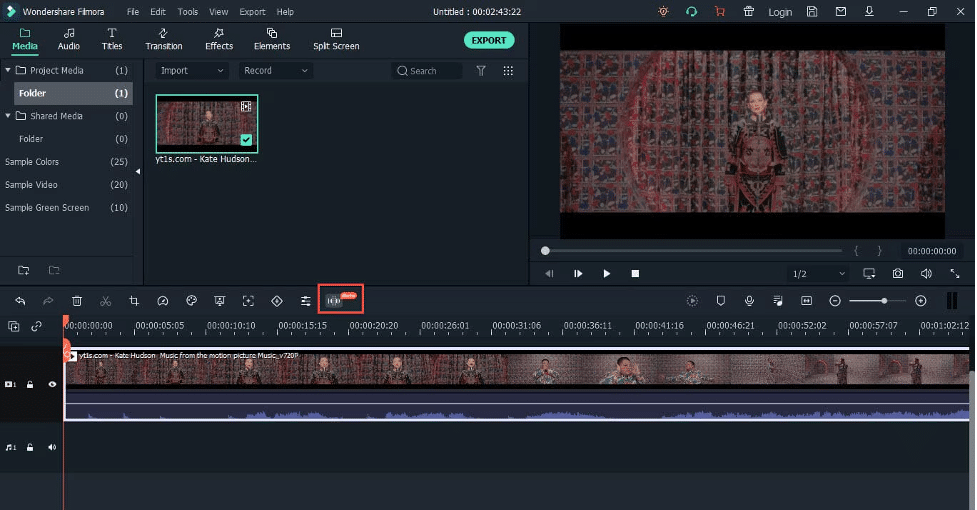
2. Add Video to Timeline:
Drag your video to the timeline (the section at the bottom where you can edit). Now, look for the music beats icon, which is the Silence Detection tool (this is only available on Windows).
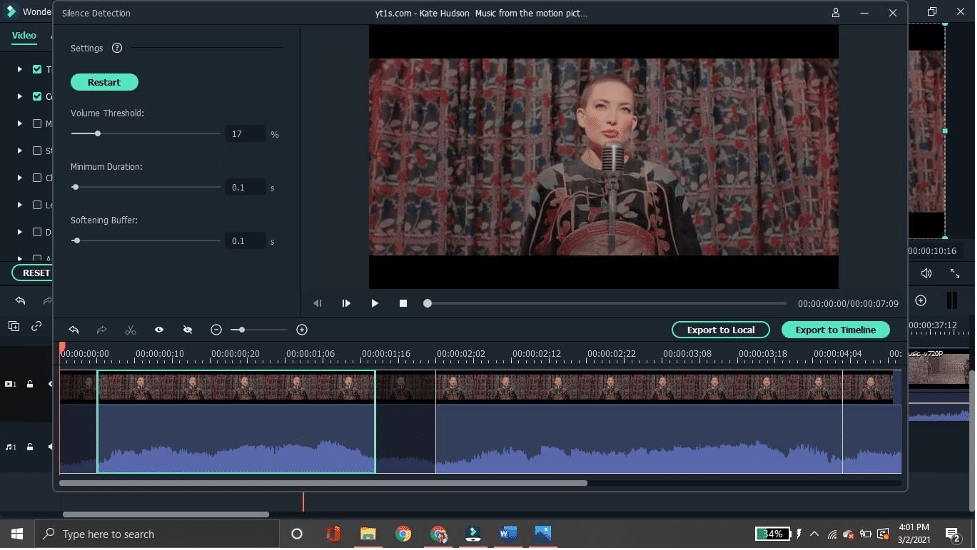
3. Adjust Silence Settings:
A new window will pop up with some options:
- Volume Threshold: This lets you set how quiet a part of the video has to be before it counts as “silent.”
- Minimum Duration: You decide how long a part has to be quiet before it gets removed.
- Softening Buffer: This adjusts how much time gets added or cut off at the start and end of each non-silent section.
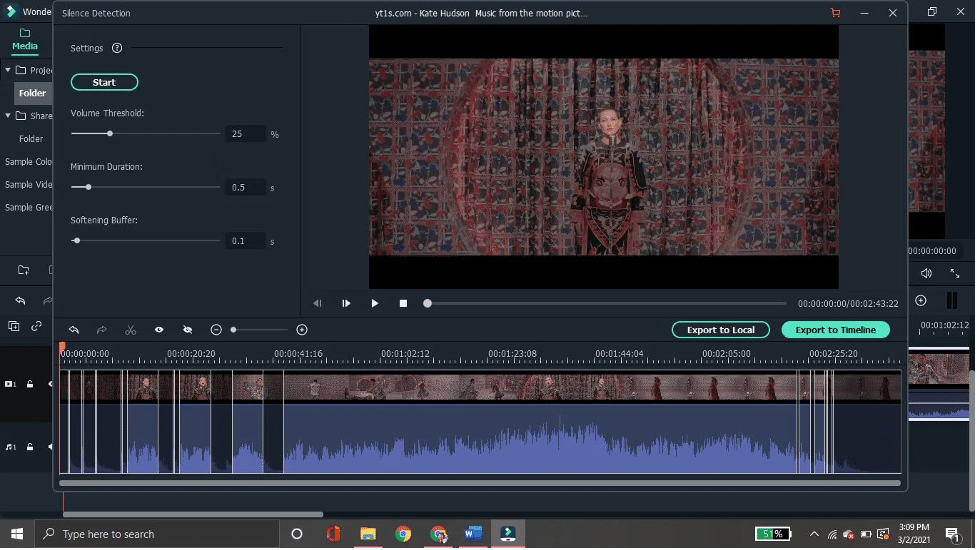
4. Remove Silence:
Once you adjust the settings, click Start, and Filmora will remove the silent parts automatically. You’ll see the quiet sections marked in black on the timeline.
5. Check Your Work:
If it didn’t remove silence the way you wanted, you can change the settings and click Restart to try again.
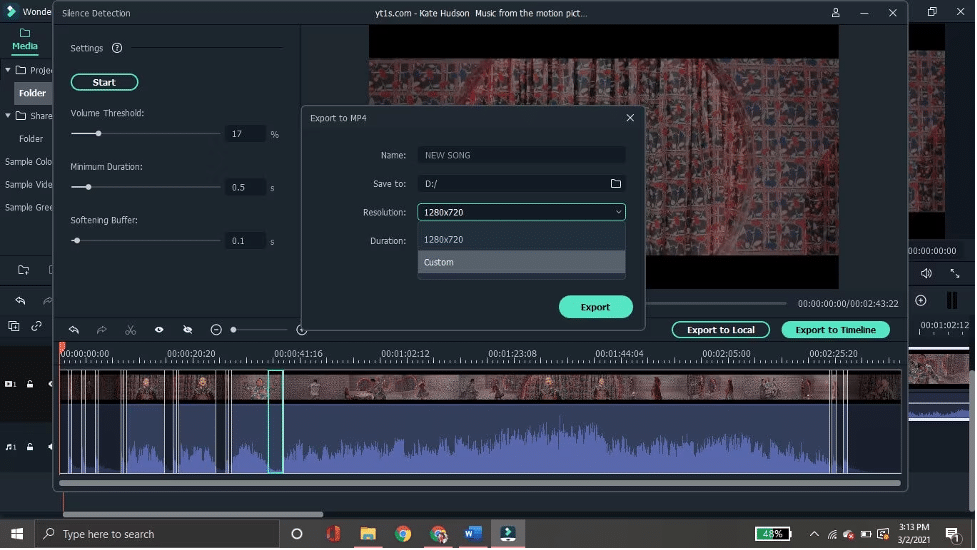
6. Save Your Video:
After you’re happy with the result, click Export to Timeline if you want to keep editing. Or, you can click Export to Local to save it directly to your computer. You can name your video and pick the resolution (how clear the video looks).
Conclusion
Silence can make videos boring and disrupt their flow. Wondershare Filmora offers an easy solution with its Audio Silence Detection tool, which automatically finds and removes quiet parts from your video.
This tool helps keep your content engaging by eliminating awkward pauses. With just a few clicks, you can adjust settings like volume threshold and duration, start the detection, and save a smoother, more polished video. This guide explains how to use Filmora’s Silence Detection effectively and improve your video editing process.